DIY PRINT AT HOME PUMPKIN CARVING TEMPLATES
Instant download, then print right on your home printer. Easy for kids to transfer to pumpkin then carve out the shapes.
-
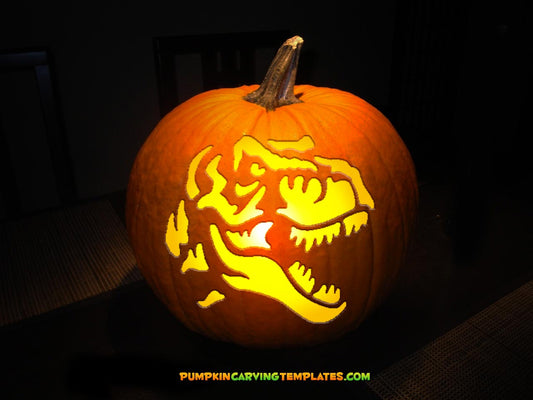
T REX Dinosaur PUMPKIN CARVING TEMPLATE DIGITAL STENCIL DOWNLOAD
Regular price $1.99 USDRegular priceUnit price per$2.99 USDSale price $1.99 USDSale -
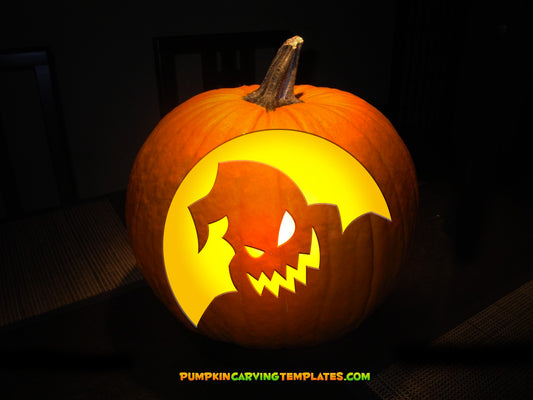
Ghost Head Monster PUMPKIN CARVING TEMPLATE DIGITAL STENCIL DOWNLOAD
Regular price $1.99 USDRegular priceUnit price per$2.99 USDSale price $1.99 USDSale -
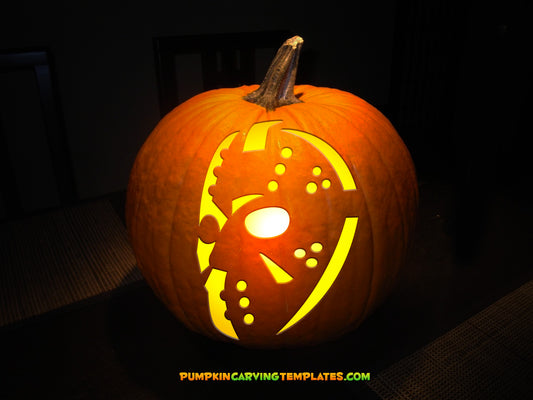
Jason PUMPKIN CARVING TEMPLATE DIGITAL STENCIL DOWNLOAD
Regular price $1.99 USDRegular priceUnit price per$2.99 USDSale price $1.99 USDSale -
Pirate Skull Scary PUMPKIN CARVING TEMPLATE DIGITAL STENCIL DOWNLOAD
Regular price $1.99 USDRegular priceUnit price per$2.99 USDSale price $1.99 USDSale

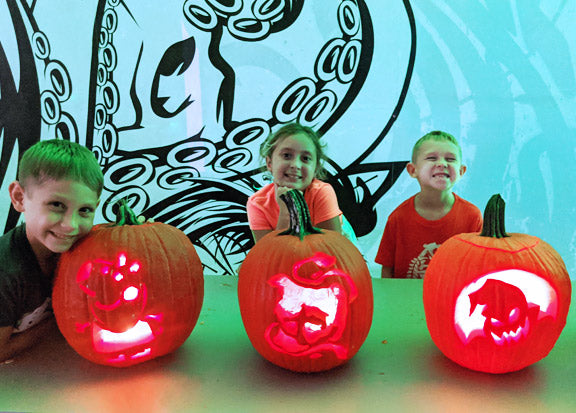
FREE TEMPLATES ARE HERE!
Our gift to you! We have made some of our designs FREE for you to download. They are easy to print on your home printer so you can start carving today! Instant jpeg downloads of hundreds of pumpkin carving designs. Fun for the whole family.
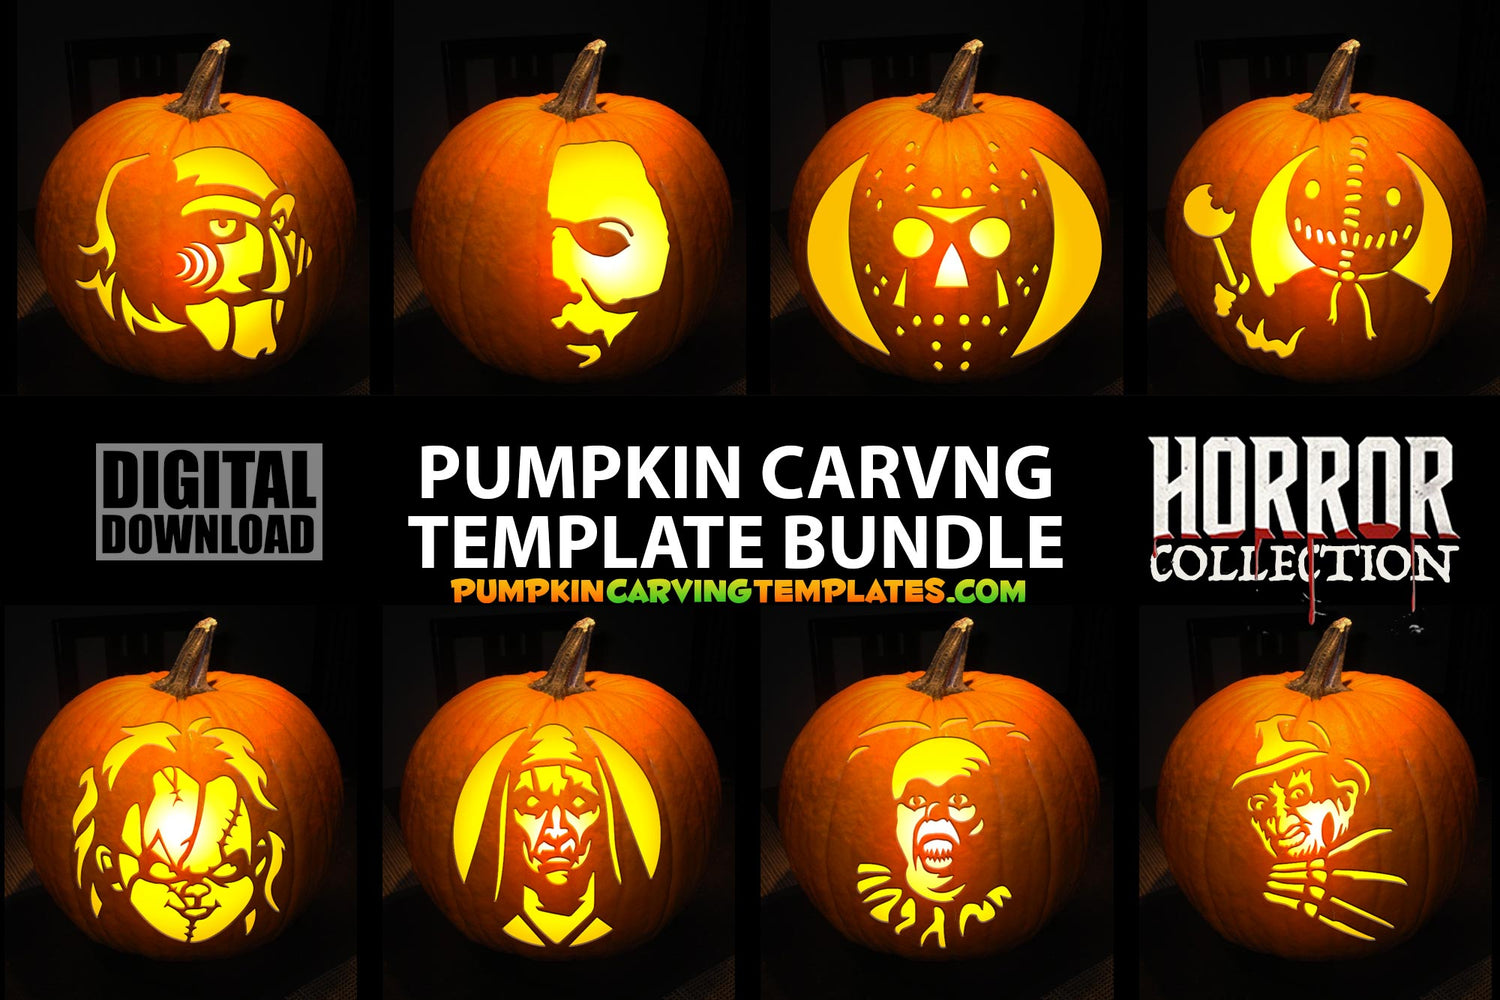
SAVE WITH BUNDLES
Can't pick just one? Well now you don't have to. We have created these horrific pumpkin carving template bundles for you and your family.
-
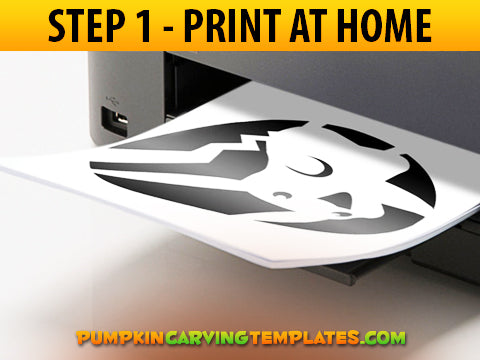
STEP 1 - PRINT AT HOME
Buy template, download file and print on your home printer. Jpeg file makes it easy to use and compatable with your home printer.
-
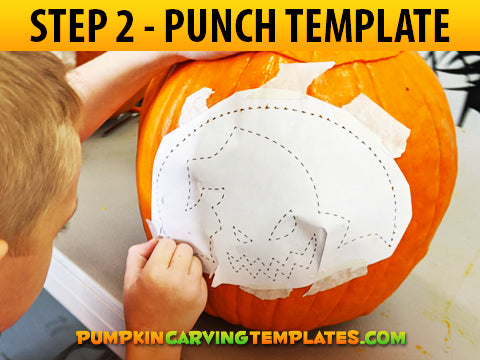
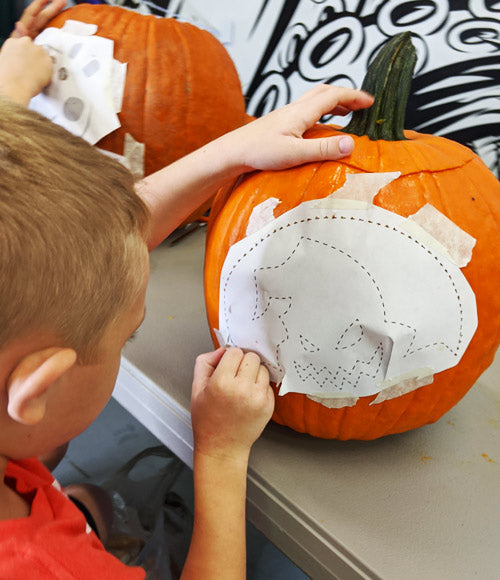
STEP 2 - PUNCH TEMPLATE
Cut out image and tape to the pumpkin. Use a push pin, nail or a pumpkin punch to punch through paper on dotted lines (or trace image). Remove paper and if you want use a washable marker or pen to trace your dots to make it even eaiser to see.
-
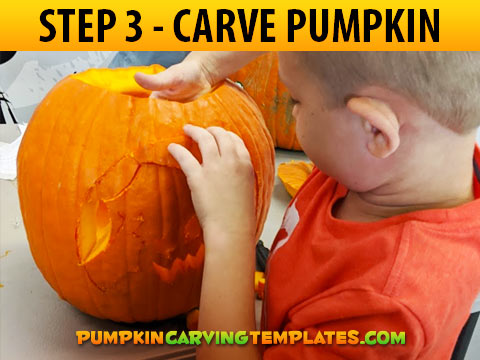
STEP 3 - CARVE PUMPKIN
Use a child safe pumpkin carving tool to carve along the dotted lines. Start with the small sections first. Some help from the parents may be needed.


ADD A CAPTION
SHARE THE PUMPKIN LOVE
OUR PRODUCTS ARE ECO FRIENDLY
Pint your template at home and recycle the paper after you are done. As for the pumpkin, you can put it in your compost pile (do people have them anymore) for they are biodegradable.
INSTANT DOWNLOAD
Download your jpeg file as soon as you cash out. File is easy to print on any home printer.
IMPRESS YOUR TRICK OR TREATERS
Carve the best pumpkins on your street with our super cool, fun, scary and spooky pumpkin carving templates.
NEWEST PUMPKIN DESIGNS
We are always designing new and creative pumpkin carving templates and stencils that you and your family will love.